1. Install and activate
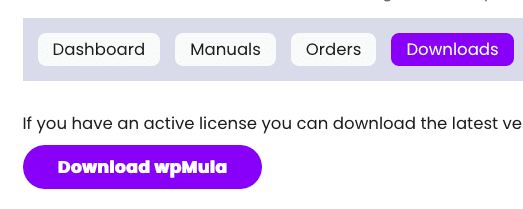
Yes, that’s correct — you need to install the wpMula plugin before we can start working. Visit the download page to get the latest version.
Well done — you’ve downloaded the plugin as a ZIP file. Now it’s time to extract the files and place them in the correct directory. There are several ways to do this.
1. Upload the zip of the plugin to your WordPress site.
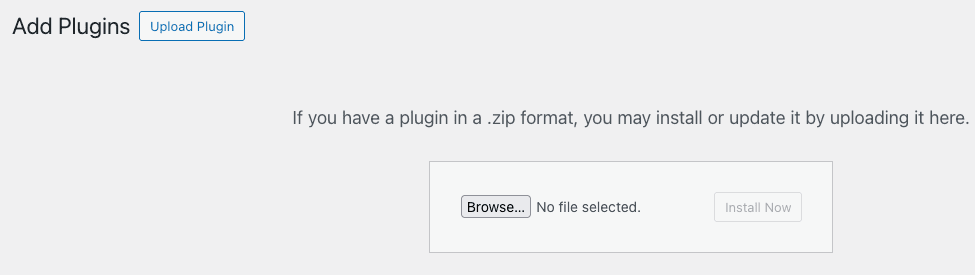
You can do this by going to **Plugins → Add New Plugin**. At the top of the screen, click the **Upload Plugin** button. After clicking, the upload screen will appear as shown below.
You can find the **Add New Plugin** page under **Plugins** in your dashboard (or network dashboard).
—
https://example.com/wp-admin/plugin-install.php
https://example.com/wp-admin/network/plugin-install.php
2. Use FTP(S) or SFTP
First, unzip the plugin files to a folder. Then connect to your site using an FTP client. Navigate to the plugins directory on your site and drag the **wpmula** folder into it. The plugins directory is usually located at **/wp-content/plugins/** within your WordPress installation.
Go to the **Plugins** page of your site under **Plugins** in your WordPress dashboard. If you’re using a multisite setup, it’s best to network activate wpMula under the network settings. In the list of plugins, wpMula should appear as shown below.

Click **Activate** to activate wpMula on your site.
—
https://example.com/wp-admin/plugins.php
https://ecample.com/wp-admin/network/plugins.php
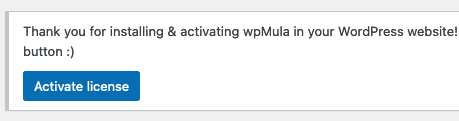
Before you can use wpMula’s features, you need to activate your license. A notice will appear on your screen — click the **Activate License** button to open the license page. There you’ll find a form to enter your license information. You can also access this page from the admin menu under **wpMula**.
Enter your details here: email address, license code, and product.
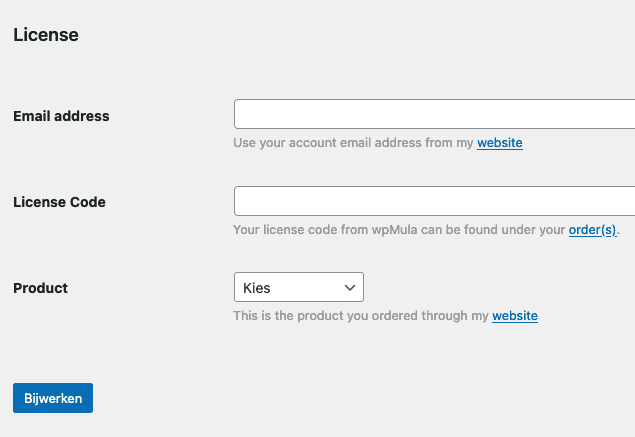
If your license information is correct, wpMula will be activated on your site.
—
https://example.com/wp-admin/admin.php?page=wa-wpmula