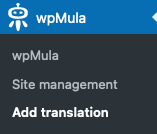
3. Add a new translation
First, determine the URL for the translation you want to add to your site. Usually, you choose the country or language prefix. For example, see the list below for some common languages.
1. German
This will be ‘de’: example.com/de
2. French
This will be ‘fr’: example.com/fr
3. Spanish
This will be ‘es’: example.com/es
4. English
This will be ‘en’: example.nl/en
5. Dutch
This will be ‘nl’: example.com/nl
The list above represents the most logical approach, but if you prefer a different structure, feel free to be creative and choose your own path.
The language you choose here will be used for the front end of your site. This can be different from the language you use in the back end. Your visitors will see the site in their language, while you can manage the back end in your own language.
Choose your admin language in the new site under ‘Settings’ and then ‘General’.
—
https://example.com/wp-admin/options-general.php
In many cases, you may want to translate your site into another language without starting from scratch. That’s exactly why this option exists — you can create a duplicate of any site in your multisite network. This gives you an exact copy that only needs translation of the content. Everything else, such as posts, pages, categories, submissions, and media, will already be available.
Before doing this, it’s always wise to create a complete backup of your site, including both files and the database. Although all wpMula functions are thoroughly tested, there’s always a small chance that something could go wrong.
After creating the backup, click **Add New Translation**. Depending on the size of your source site, creating the new translation may take some time.


